Roll The Tape

move over masking tape
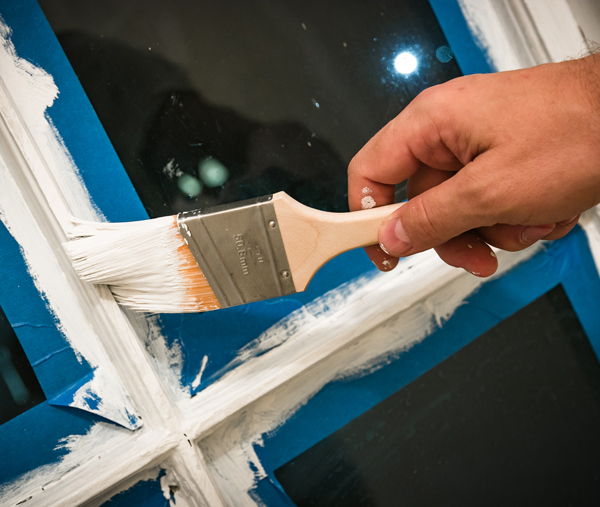
 Only high quality painter’s tape does the job when it comes to ensuring sharp lines and smooth finishes, not to mention protecting window and door frames, trim, and baseboards you want to keep free of paint.
For one, painter’s tape is a more effective masking tool simply for the fact that it’s better at reducing paint bleed. Plus it’s easier to remove without marring the surface. Compared to run-of-the-mill masking tape, painter’s tape will not pucker up, or bubble after it’s applied, so it reduces the chance of air bubbles allowing paint to seep underneath. It’s simply the more reliable choice.
Not all painter’s tape is created equal, of course. They come made for different substrates (drywall, wallpaper, woodwork, etc.) and in different adhesive qualities. Some are made for different decorative projects and crafting. Choose a tape that is not only easy to apply and to remove, but is suitable for multi-surface applications. If you are unsure, it is best to ask the experts at your Diamond Vogel Paint Store for their recommendation. Once you get home and are ready to start your paint project, keep these simple tips in mind for applying, painting over, and removing your painter’s tape.
 |
|
|
step 1: clean the surface area
Painter’s tape will not stick if the surface is dirty, dusty, or damaged, and poor adhesion will lead to seepage. Use TSP (Trisodium Phosphate) or warm water, mild detergent and a sponge to wipe down all surfaces, allowing them to dry well before starting.
step 2: temperature matters
Room temperature is a factor in effective tape application. If it’s too hot or humid, the tape can become stickier or leave adhesive behind; too cold and the tape might crack, break, or peel off unevenly.
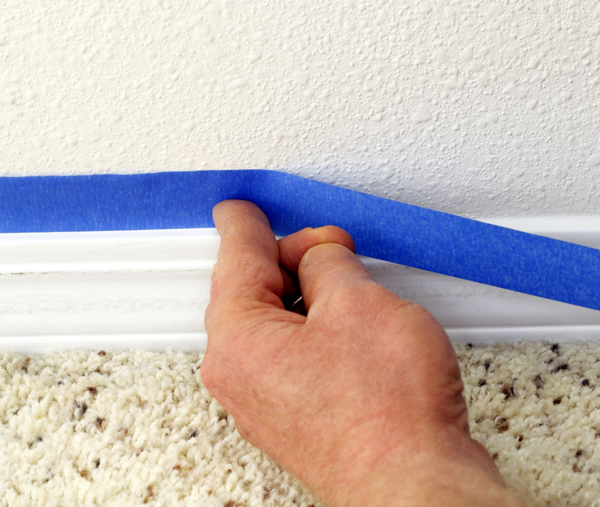
step 3: measure out a short piece
Cut a section of tape at a time and carefully apply it to the area you want to mask. If you try applying it in one long strip, the tape may stretch and won’t lay flat or stick properly. Firmly press and smooth down the tape. Use your fingertip or a flat putty knife to ensure even contact and a tight bond to the surface. Creating some friction warms the adhesive, ensuring a better bond.
step 4: after the last coat
The tape should be removed after the last coat of paint has begun to dry, usually in about an hour. Don’t leave it on too long as the longer the tape stays down, the more difficult it will be to remove. If you see a spot where the paint might lift away with the tape, use a putty knife or a razor blade to lightly score the edge and break the bond where the paint and tape meet.
step 5: rate of removal
Gently pull off the tape at a 45-degree angle, using a controlled and consistent rate of removal – if you pull too quickly, you may remove paint; if you pull too slowly, you could leave adhesive. If there is any residue left, it can usually be washed off with soap and water or a citrus based cleaner. Check the manufacturer’s instructions for more information.
 Read this excerpt and more in our 2017 Fall edition of Diamond Vogel's At Home Magazine

![]()